The Nel Brothers Stud Tips and Ideas
Keeping your Chicks Safe 1
Keeping your Chicks Safe 2
Make your own Iodine Blocks
The following has been provided by the Nel Brothers Stud.
In order to keep chicks safe once they venture out of the nest box the following can be made and placed in the breeding cage so that chicks can hide under this if the parents try to peck them. This is a quick and very cheap option which works well. Especially good if you run our of the Chick protections built in Keeping your Chicks Safe 2 below.
Material required is:
Plastic butter dish or any dish which will be a usable size.
Knife or Scissors to cut entrance whole.
Amounts needed:
One dish per nest.
Other items needed:
None
Preparation:
Cut an entrance hole in the side of the butter dish to the sizes you require.
Construction:
None.
Comment:
Make sure the butter dish size will fit through your breeding box door.
The following has been provided by the Nel Brothers Stud.
In order to keep chicks safe once they venture out of the nest box the following can be made and placed in the breeding cage so that chicks can hide under this if the parents try to peck them.
Material required is:
3 Ply wood or any spare pieces of wood.
Couple of screws.
Wood glue.
Saw to cut the wood.
Amounts needed:
3 Ply wood (or other) 100mm wide x 500mm long.
8 wood screws.
Other items needed:
None.
Preparation:
Cut the wood to the sizes below or to the sizes you require:
2 x 100mm x 100mm.
2 x 100mm x 150mm.
Construction:
Take one 100mm x 150mm piece of wood and using 2 screws screw one of the 100mm x 100mm pieces to the edge so the 100mm edges match.
Note that the screws must go through the 100mm x 150mm pieces.
Remember to add some glue before screwing (optional).
Do the same with the opposite side of the 100mm x 150mm piece of wood.
Take the 100mm x 150mm piece and add so that it forms a back side and screw onto the edges of the two 100mm x 100mm pieces already fitted.
Comment:
Make sure the size you are making will fit through your breeding box door.
Don't make the sides too high as you don't want the parent following the chick and having the option to get above the chick.
Iodine Blocks (How to make your own.)
The following has been provided by Gert Pieters.
Ingredients required are:
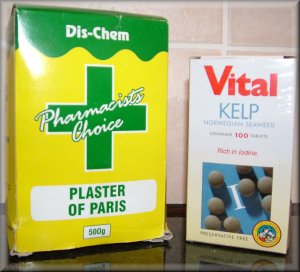
Plaster of Paris.
Kelp (Ask for Vital Kelp - 100 tablets).
Salt
Water
The Plaster of Paris and Kelp are obtainable from Dis-Chem in South Africa.
Amounts needed:
1,5 kilogram Plaster of Paris.
5 Kelp tablets.
1 teaspoon of salt.
3 litres of water.
Other items needed:
Paper clips or wire for Iodene block hook.
Ice trays or other mould.
Preparation:
Mix 3 litres of water and add 5 Kelp tablets. Let it stand for 30 minutes or
until pills have disolved.
Mixture:
Take the Kelp water and add 1 teaspoon of salt. Mix well.
Mix 1,5 kilograms of Plaster of Paris into the Kelp water.
Note: To make the blocks harder use less water or more Plaster of Paris.
Additional Ingredients:
You can add grit and charcoal to the above mix if you like.
Making Iodine Blocks:
Pour mixture into ice trays or moulds.
Wait for a few minutes and when mixture starts to set insert clips or wires.
Let it stand for one day.
Remove from ice trays or moulds and let it stand a further day.
Use as required.
Comment:
Note that the above makes about the following amount of Iodine blocks:
64 x Large ice tray blocks plus.
3 x 500 gram blocks.
Back to Top